
When you are faced with a really tight budget, you sometimes have to use the same product over and over again because it doesn’t cost a lot of money. Believe me, 1000$ for a teenager’s bedrooms goes out fast! So when it comes to furnishing, to add a bit of variety to a limited choice, you have to personalize and that’s exactly what I did with IKEA’s SNILLE chair for one of the rooms I recently did.
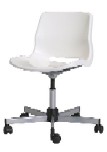
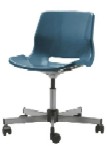
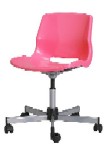
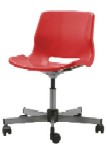
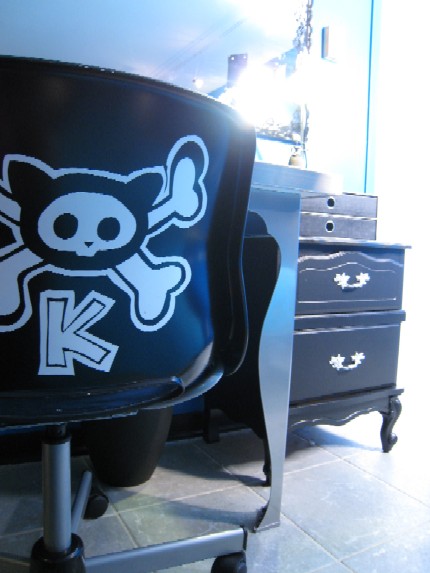
At $29.99, they are the cheapest I could find with a decent look. Problem is, they only come in four colors: white, blue-green, pink and red. (Perhaps they’ll eventually add more color choices). In any case, they just didn’t fit my design. I needed a chair with a bit more edge to match my client’s personality and style. So I put together a drawing that I felt better represented her personality (as shown below) and spray painted the chair black.

I’m sure there are many ways to do this, but here’s how I did it. No fuss. Anyone can do this in a couple of hours.
Here’s what you need:
- painter’s tape
- black marker
- black and white drawing (drawn or printed)
- scalpel
- black spray paint (or any color you like)
First I laid out several rows of painter’s tape on the back of the chair to cover the surface that needed to be protected. Then I temporarily stuck the drawing on the back in order to trace it onto the tape. I also made a point to write where I wanted the black and the white to be so I wouldn’t mistakenly spray-paint where I didn’t want to.

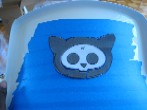
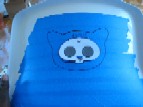
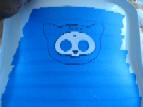
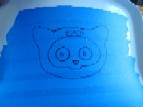
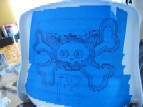
Then I used the scalpel to carve out all the bits of tape I didn’t need. It’s basically just a question of tracing with the knife and peeling off the unwanted pieces of tape. Once I was satisfied with my homemade template, knowing that everything blue on my chair would become white and everything white would become black, I spray painted the chair. It took 2 coats.
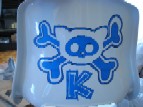
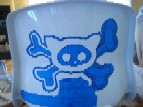
And voila: A personalized and rockin’ SNILLE chair. She loved it!
I don't understand the extra step with the blue colour. Could have traced the pic onto transparent sticker foil, put it on a white chair, spray everything black then remove the foil.
ReplyDelete@kiki: Thanks for your comment. The blue is actually painters' tape that I added to the chair in order to create the template on the chair by drawing on it. It works the same way. The first set of pictures shows how I traced the image on it. The second set shows the portions of the tape I took out to get the final results.
ReplyDelete