Here's an idea. If you're planning a Halloween party tonight, why not make it chic with some DIY Halloween decorations. They don't have to cost a lot but they can make a great impact.
These little ceramic birds were only one dollar each. 
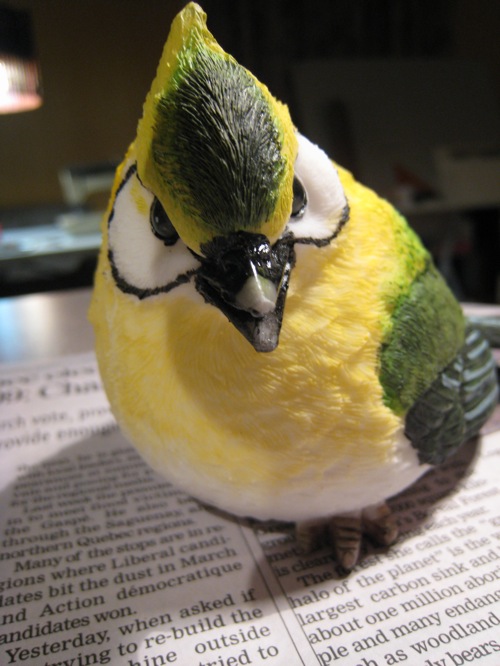
Add a little black and silver paint, and voila! Some eerie birds to complement your space. 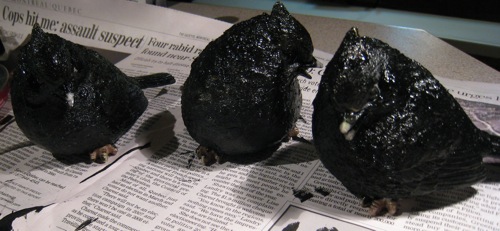

These birds are perfect perched somewhere high looking down at your guests.


Showing posts with label diy. Show all posts
Showing posts with label diy. Show all posts
10.31.2009
Halloween Decoration
8.10.2009
Wall flowers
Doing the dishes isn't fun. Doing the dishes while staring at a plain back splash is even worse! Since you can't always make major changes, you have to be a bit more creative. Here's a simple solution to add a bit of life to this area. 
All you need are 3M sticky hooks, wall vases, flowers and five minutes of your time.
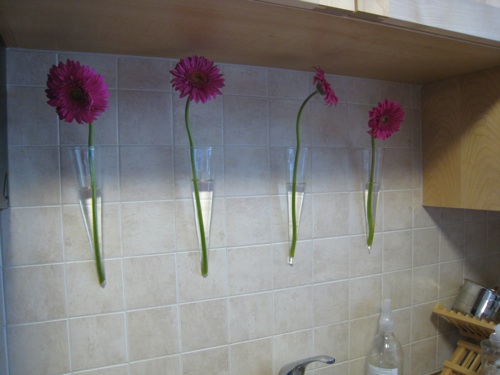
The sticky hooks are great because they don't damage the tiles. Of course you can personalize it any way you want using different types of plants or vases. The vases in this picture are from Jysk. Zone Maison also has really nice ones.
3.26.2009
North River Penthouse
I believe that even if you live in an rental, you should take the time to design and decorate it to your taste. Your environment affects your well being in so many different ways, so why not take the time to customize it so you live a little happier and a lot more comfortable?
I'm currently starting a new project : North River Penthouse, which is a rental, so obviously we don't want to spend too much money on it, but it can definitely use a bit more personality. Don't get me wrong, it's a nice apartment, but I find it to be a little too much on the yellow side (the floor, the wall, the cabinet).
So one of the main things will be to break that yellow and introduce other colors. In this case, we're going modern and sleek look (as much as possible) and we're taking inspiration from nature (rocks, woods, etc). 

First things, first : Paint. It's the cheapest and easiest way to completely change the look and feel of a room without spending too much money. This time, we're going with grays: A light warm gray from Benjamin Moore called Gray Owl and a darker gray for a bit of contrast, also from Benjamin Moore, simply called Gray. These will be used throughout the flat. 

For some reason, I love chalkboard paint. I've used the one from Benjamin Moore on several projects and I'm going to use it again on this wall. I also finally found a magnetic chalkboard paint that I will try on this project. The magnetic chalkboard is much heavier than the Benjamin Moore one. We'll see.
The wall is pretty much ready to be painted. In this case I chose the "box" to receive the chalkboard paint. I like to use the architecture to decide where the paint is going to go. 
Here's a neat little trick: When I take out the outlet covers, I always tape the corresponding screws directly on the plate to make sure I don't loose them. 
Stay tuned for more coming soon :)
2.27.2009
Rockin' SNILLE
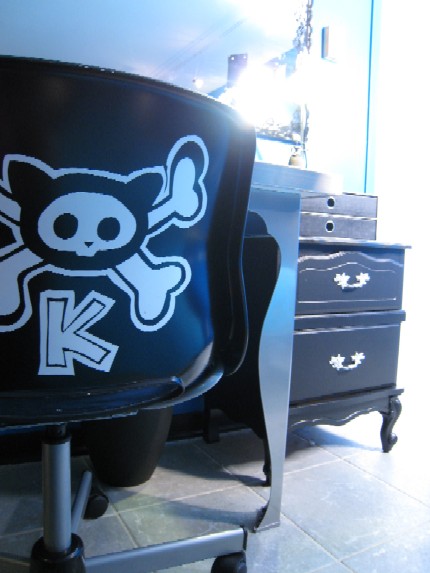
When you are faced with a really tight budget, you sometimes have to use the same product over and over again because it doesn’t cost a lot of money. Believe me, 1000$ for a teenager’s bedrooms goes out fast! So when it comes to furnishing, to add a bit of variety to a limited choice, you have to personalize and that’s exactly what I did with IKEA’s SNILLE chair for one of the rooms I recently did.
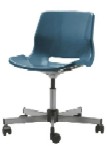
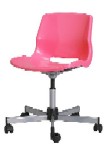
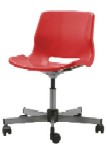
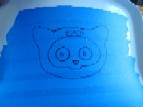
At $29.99, they are the cheapest I could find with a decent look. Problem is, they only come in four colors: white, blue-green, pink and red. (Perhaps they’ll eventually add more color choices). In any case, they just didn’t fit my design. I needed a chair with a bit more edge to match my client’s personality and style. So I put together a drawing that I felt better represented her personality (as shown below) and spray painted the chair black.

I’m sure there are many ways to do this, but here’s how I did it. No fuss. Anyone can do this in a couple of hours.
Here’s what you need:
- painter’s tape
- black marker
- black and white drawing (drawn or printed)
- scalpel
- black spray paint (or any color you like)
First I laid out several rows of painter’s tape on the back of the chair to cover the surface that needed to be protected. Then I temporarily stuck the drawing on the back in order to trace it onto the tape. I also made a point to write where I wanted the black and the white to be so I wouldn’t mistakenly spray-paint where I didn’t want to.

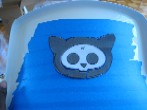
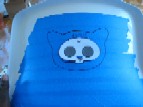
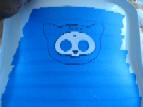
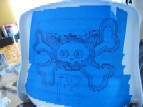
Then I used the scalpel to carve out all the bits of tape I didn’t need. It’s basically just a question of tracing with the knife and peeling off the unwanted pieces of tape. Once I was satisfied with my homemade template, knowing that everything blue on my chair would become white and everything white would become black, I spray painted the chair. It took 2 coats.
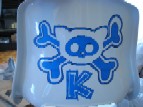
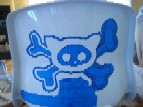
And voila: A personalized and rockin’ SNILLE chair. She loved it!
1.06.2009
RIBBA Hack
I've been thinking about doing this hack for quite a while and I finally had some time to do it and hang in on the wall. It turned out great. It's an original way to add art and increase the amount of lighting in the room.

I used 3 Ribba Frames and glued a 14" x 14" mirror on each of them with construction adhesive. Then I printed pictures of flowers on a transparent adhesive paper made for windows and attached them to the mirror.


I used 3 Ribba Frames and glued a 14" x 14" mirror on each of them with construction adhesive. Then I printed pictures of flowers on a transparent adhesive paper made for windows and attached them to the mirror.
Subscribe to:
Posts (Atom)